Do you ever wonder how to install WordPress on VPS-Hosting? In this guide, I will explain how you can install WordPress on your VPS like a real professional.

The advantages of running WordPress on a VPS
When coming from shared hosting, moving your site to a VPS (what is a VPS anyway?) can be daunting. But it has many advantages.
- You don’t share resources with other websites on a server
- You can scale up your server easily when your site grows
- You’ll usually get way more performance for fewer costs
Various ways for installing WordPress on a VPS
There are several ways to Rome, even if it was a server. In this case, you can install WordPress on a VPS in various ways:
- Do everything manually (here’s a great course to learn about Installing WordPress on a VPS).
- Use an installation script that predefines everything beforehand.
- Use a Control Panel or a host that manages the installation for you.
- Hire someone to do it for you, at Fiverr or Upwork.
In this guide, I’ll be showing the second option, using an installation script. Now there are a couple of installation scripts available for WordPress, such as Easy Engine, Webinoly, Slickstack and WordOps. I tested them all and found WordOps the most convenient to work with.
WordOps is great, easy to use, offers SSL certificates, and optimized speed and is not dependent on external suppliers or providers.
Some providers also offer managed VPS-Hosting, where you can log in to a control panel and easily install WordPress. That’s the preferred way to go if you don’t like to administer a server.
How to Install WordPress on a VPS using WordOps
Already, let’s get to the body of “How to install WordPress on VPS-Hosting”.
1. Create an SSH-key
If you are going to run a VPS, you need to log in from a remote location to manage it. This can be done over SSH, which is a protocol for secure connections. Logging in via SSH can be done using SSH keys or a user-password combination, where the former is usually the best option.
Mac & Linux
In Mac and Linux, you can just open the terminal or command line and use the following command:
ssh-keygen -t ed25519 -C "Any comment you like"We’ll be using ed25519 as a variant, which is said to be safer. Tada, you have generated your key pairs!
A Macbook stores the generated keys in the following location: /Users/<username>/.ssh
Windows
In Windows, it’s a bit more cumbersome.
- First, you have to make sure OpenSSH is installed. Go to Optional Features (under Apps & Features in your Windows Settings), and search for OpenSSH. Make sure it is installed.
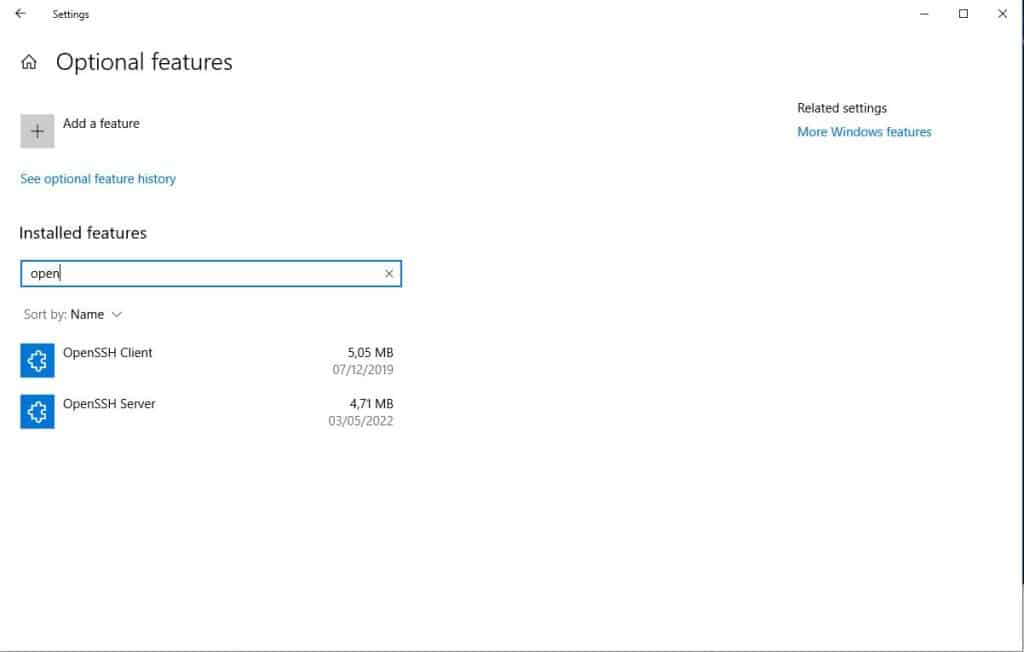
- You can now generate an SSH key using Powershell. Click on the Windows icon in your taskbar, search for Powershell and right-click “Run as Administrator”.
ssh-keygen -t ed25519 -C "Any comment you like"- Run the same command as for Mac or Linux!
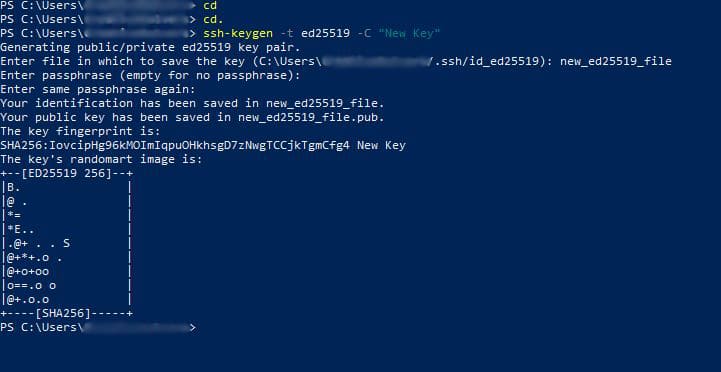
- By default, Windows stores your keys in C:/Users/<username>/.ssh, unless you use a custom filename, then it will save the file in the current directory you are in. (Use the cd .ssh command to move to the .ssh folder, providing you are in the C:/Users/<username>/ folder).
2. Create a Server at a Server Provider
Obviously, you need a VPS if you want to run WordPress on a VPS. There are many VPS providers out there, and many are really good. I tested many of them on VPS performance, and I have some favourites:
My three favourites are Upcloud ($25 starting credits), Hetzner ($20 starting credits) and Vultr ($100 starting credits for 14 days).
In this guide, I will be using Upcloud, but feel free to use any provider of your liking.
Add Your SSH-key
Do you remember the key you just created in part one? You need to add it to your server provider, which usually can be done in your account settings.
- So head over to your account in the cloud provider, and look for a setting named API Keys.
- From your computer, open the file you just generated that ends with .pub, such as id_ed25519.pub.
- Add this value to the field when you click something like ‘Add API Key’.
Spin-up a New Server
Let’s create a new VPS server. This is how it looks like in Upcloud:
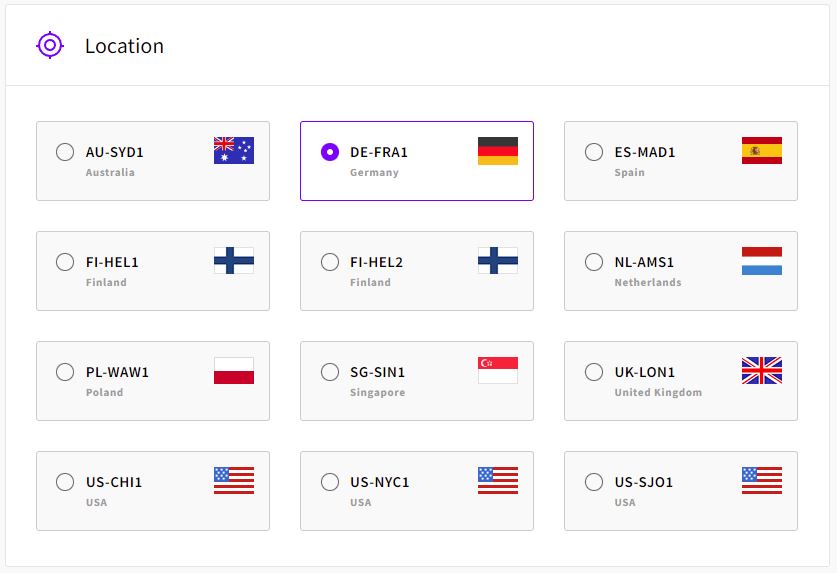
- In this case, Upcloud offers many locations. Choose a location that is as close to the majority of your visitors as possible, as this has an influence on your performance. For me, Germany is fine.
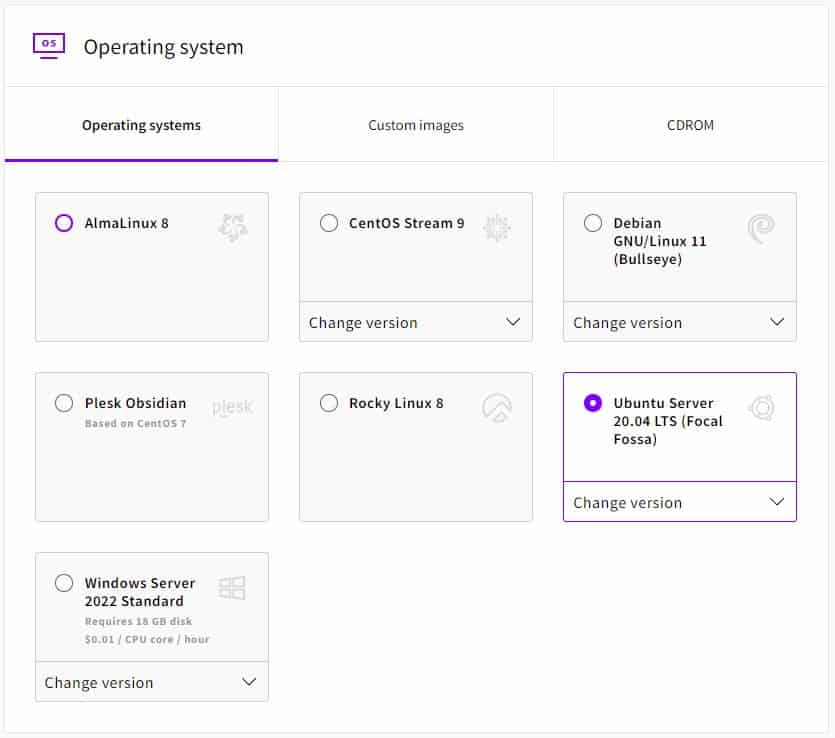
- Select the operation system, which should be Ubuntu Server 20.04
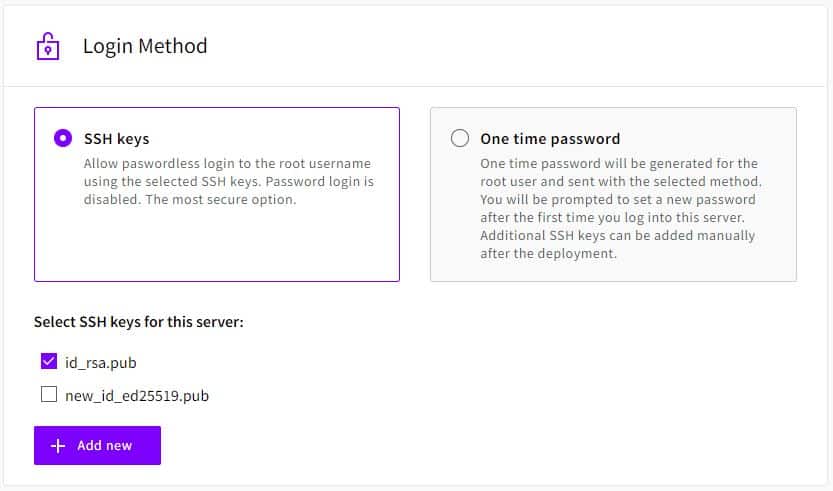
- Select the desired SSH key for the login method, as shown on the screen above.
- If the provider is supporting backups, you can enable it if you want backups at the server level.
Remember the IP-address
Your server is now being created (it usually takes between 15-60 seconds), and it will have an IP address. Copy or remember this address as you will need it later.
3. Point the Domains to your Server IP
Before we start installing WordPress, we already need to point the domain(s) you are going to use to the IP address of the server. I am using Cloudflare for my domains, but any register will do.
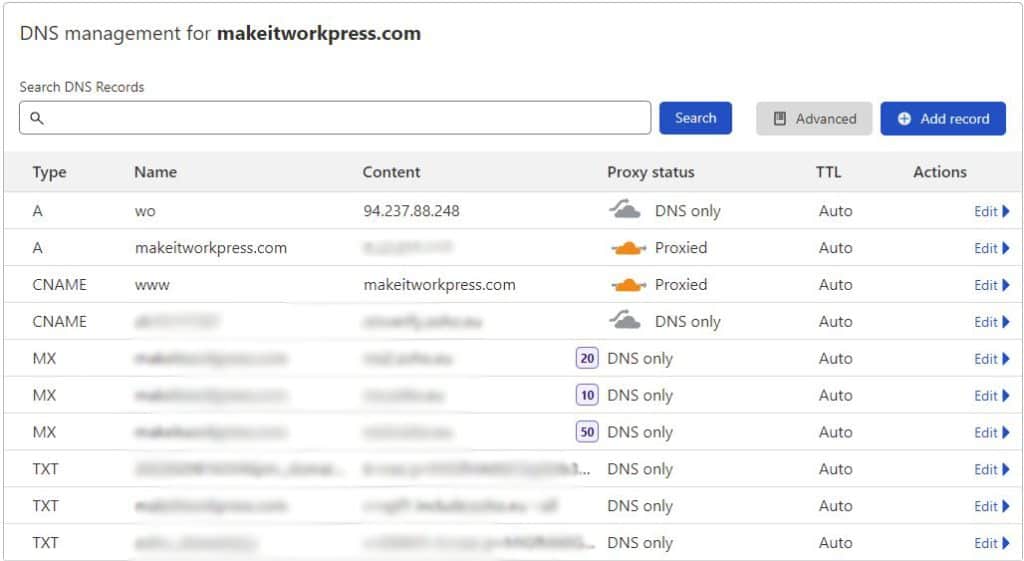
- Head over to your domain at your register, to something like domain or DNS settings.
- In your DNS settings, add an A record with the following values: type: A, name: either @, your domain, or your subdomain if you want to use that, value: <your_server_ip>, TTL of auto or as low as possible. As you may understand, should be replaced with the IP address of your server.
- In my case, I used wo as a subdomain (which results in wo.makeitworkpress.com)
4. Log in to your server
- Go to your Terminal, or Powershell; if you are using Windows. Type the following command:
ssh root@<your_server_ip>Obviously, <your_server_ip> should be replaced with the IP address of your server. You are now succesfully logged in!
5. Use a WordPress Installation Script
In this guide, we’ll be using WordOps as I mentioned before. This is the easiest part.
- First, enter the following command in the command line of your server:
wget -qO wo wops.cc && sudo bash wo- You need to wait for a bit, as WordOps now installs all required dependencies.
- You now have the ‘wo’ command available, with many powerful options. Subsequently, install a WordPress site using the following command (replace <your_desired_domain> for the domain you want to use, such as wo.makeitworkpress.com):
wo site create <your_desired_domain> --wp- There are many options and flags that can be added to these commands. The following example will install a WordPress site with Nginx FastCGI Cache (for enhanced performance) and an SSL certificate from LetsEncrypt:
wo site create <your_desired_domain> --wpfc -leYou can read a lot more about all the commands WordOps offers in their excellent documentation.
And that’s it, you now have installed WordPress on your own VPS!
6. Enjoy a bloody-fast WordPress Website
And you are done, in under 15 minutes you have set up a WordPress website on your own VPS; with a lot of other tools available through the WordPress scripts.
Your site will also run pretty fast. In my test, it could support up to 2100 requests per second with caching turned on, and around 11 requests per second when turned off. And that’s on a $5 a month server. Premium performance, but not a premium expense.
What VPS-Providers should I use?
In case you missed it in the beginning, these are my three favourites (and these also perform really well in performance benchmarks):
Upcloud
has great performance, a 100% Uptime SSL and competitive pricing with data centres in many continents around the world.
Hetzner
Hetzner gives the most value for what you pay, offering more than twice the computing power compared to equal providers. They have data centres in Europe and North America. Their servers also run on sustainable energy.
Vultr
Vultr has incredible performance, offering speedy VPSes with 3.8GHZ CPUs and has over 20 data centres around the world.
(The starting credits expire after 14 days)
Tip: Use Managed Services or Control Panels
Running a VPS server of yourself can be daunting, and unless you like (or love) learning about system administration and these geeky things, it is not always recommended. There are however a couple of Control Panels and Systems out there which I can recommend.
Control Panels
Control panels make server administration much easier by wrapping a visual interface around usual tasks, such as adding websites, improving performance, creating databases and so on. These are the best 3 in my humble opinion:
You can find more control panels in my post about the best control panels for WordPress.
Managed VPSes
And if being an absolute pro is too much, managed hosting is there to rescue. The best Managed VPS provider out there is Cloudways, which takes all system administration and other worries out of your hands. It comes with a cost though, because you can not have root access.
Let’s install WordPress on a VPS
I hope you could follow along and could install WordPress on your own VPS. I’m curious about your experiences, so feel free to leave them below. Happy system administration and blogging!


