Have you heard about QUICcloud? QUIC.cloud is a fantastic platform and CDN for WordPress site optimization and integrates with any website that runs on LiteSpeed. It boasts several features, such as:
- Caching your website on multiple servers around the world, making it fast.
- Securing your website against common attacks and so called DDOS attacks.
- Optimizing the images on your WordPress website and image placeholders, making it even faster.
- For advanced users: a fast DNS service.
The best part? You can have a part of these features for free, making it a very interesting platform to make your WordPress website run well.
In this article, I will go through the steps of setting up a site with the QUIC.cloud CDN (what is a CDN?). I’m also writing an elaborate review about QUIC.cloud, where you’ll find more details about this service.
Prerequisites
QUIC.cloud is always used together with LiteSpeed. Since it is so tightly integrated with LiteSpeed, which is a webserver (simply said, software that can run a website). And because of that, there are some requirements:
- To use Quic.cloud, you need to host your WordPress website at a provider that supports (Open)LiteSpeed. I would either recommend Hostinger or Namehero (for beginners), Runcloud (for developers bringing their own cloud servers) or Closte (for serious companies).
- You can find more background information on how to set-up a website at Hostinger and Runcloud in their respective reviews: Hostinger Review and Runcloud Review.
- You also need to have an account at quic.cloud. Signing up is easy, and can be done here at QUIC.cloud’s website.
- It doesn’t really matter which version of LiteSpeed you are using. This can be either OpenLiteSpeed, LiteSpeed or LiteSpeed enterprise.
Alright, let’s go through the steps. The below video does the same:
Step 1: Make sure you havea LiteSpeed Website
- Make sure your website runs on LiteSpeed.
- Install the LiteSpeed cache plugin from the WordPress plugin repository.
If you don’t have a website on LiteSpeed, you can try one of the mentioned hosting providers.
Step 2: Signing up for QUIC.cloud
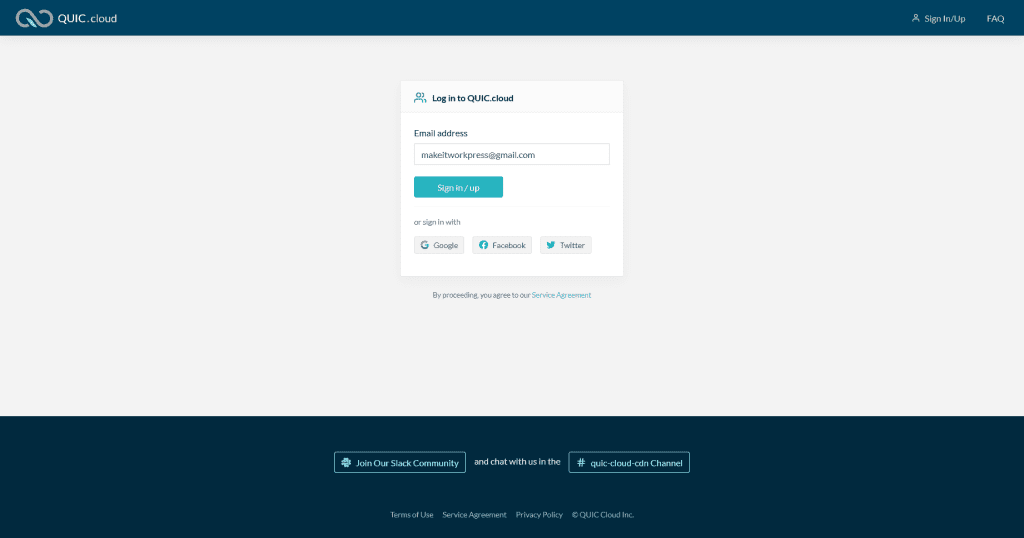
Sign up for an account at QUIC.cloud. It’s as easy as going to their website and hitting the signup/log in button. Fill in your details, confirm your email and you’re done.
Step 3: Requesting a domain key at your Website
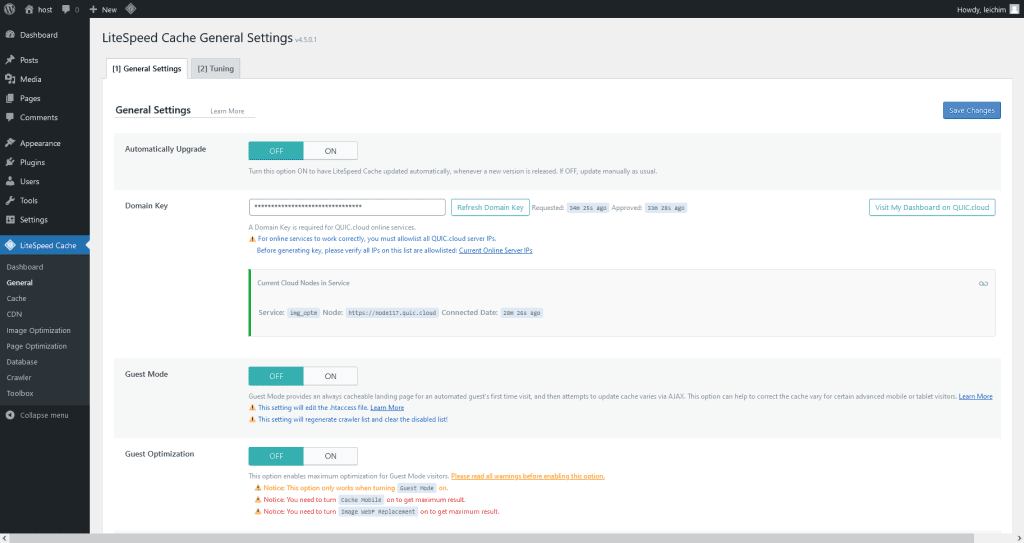
- In the settings for the LiteSpeed cache plugin, you should generate or refresh a domain key. This setting can be found under LiteSpeed Cache > General, Domain Key.
- You don’t even need to copy this domain key, but you have to connect it to QUIC.cloud by clicking the Link to QUIC.cloud button next to the domain key field. This will bring you to the log in form on the QUIC.cloud website, where you need to log in to connect the website.
Step 4: Enabling the CDN
Your website will now appear in the control panel of QUIC.cloud.
Now, make sure to enable the CDN in two places. From the control panel, head back to your WordPress dashboard and go to the LiteSpeed Cache CDN settings.
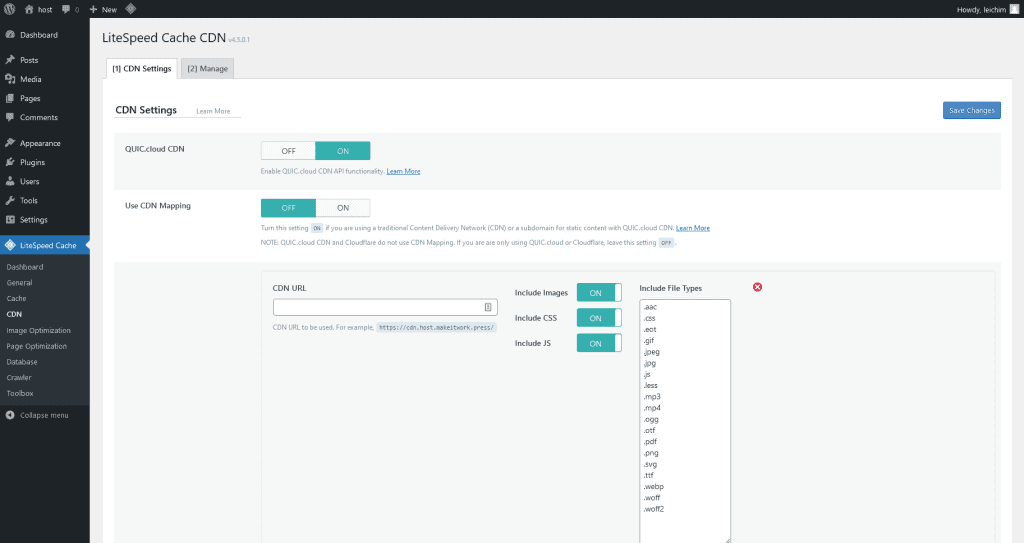
- First, enable the CDN in the LiteSpeed cache settings in WordPress, under LiteSpeed Cache > CDN.
- Secondly, enable the CDN in the QUIC.cloud control panel by clicking the switch for enabling the CDN (click on your site in the overview, then go to CDN, status, and click enable CDN).
- You will now see a screen with two options: I want to use CNAME or I want to use QUIC.cloud DNS for my root domain. Choose the first option, unless you also want to use the DNS services and know what you are doing. Confirm your choice.
Step 5: Connect your domain
After you have enabled the domain in your QUIC.cloud dashboard, you will get a value that you need to set up as a CNAME record in the DNS settings of your domain. These are usually found at the place where you registered your domain, called the domain registrar.
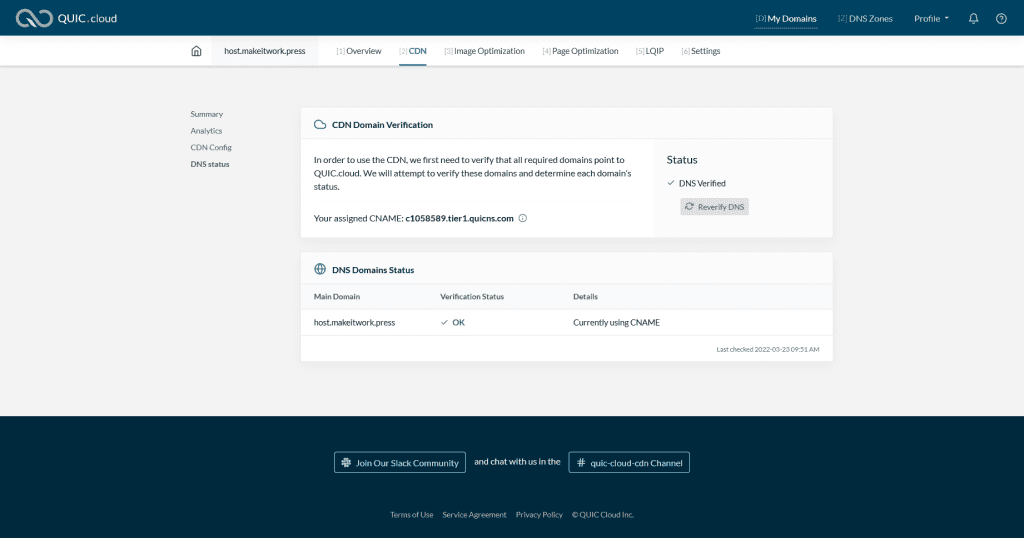
- At your domain registrar, you need to adapt the DNS settings for the domain your website is running on.
How this can be done greatly varies depending on the registrar you are using. Many shared hosting companies, such as Hostinger, provide the possibility to register and manage domains.
Usually, the place where you can alter your DNS settings for your domain is called DNS manager or DNS settings (and make sure you have selected the correct domain first).
- Make sure to change or remove any A records for the (sub)domain that you are using.
I’m using Cloudflare, which is also one of the places where you can many popular domain extensions for a very low price. As I’m setting up the QUIC.cloud functionality for my subdomain host.makeitwork.press, it will look like this:
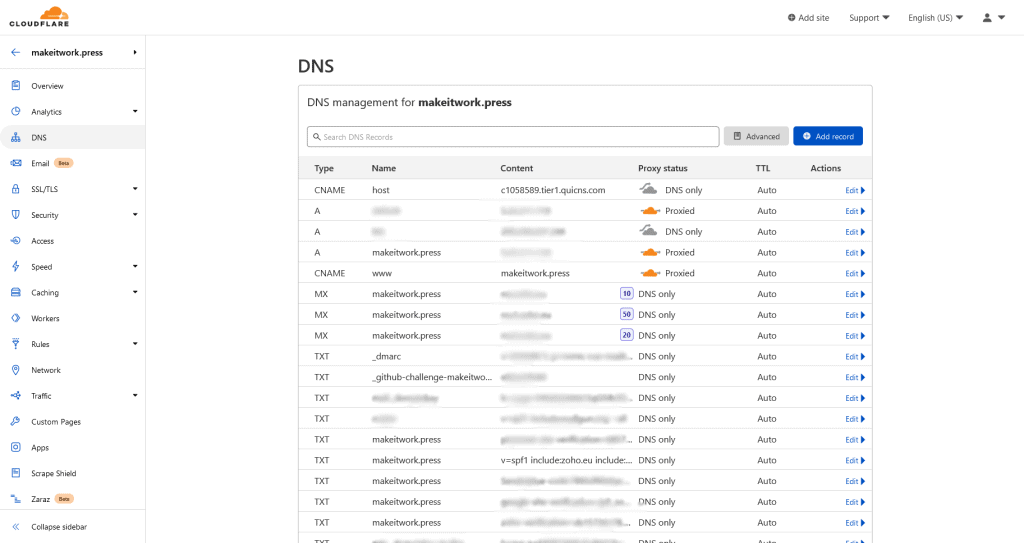
- Add a cname record for your root or subdomain that points to the cname verification value you got.
It will now take up to 20 minutes for QUIC.cloud to set everything up. After that, you have your WordPress site running on QUIC.cloud!
Step 6: Other QUIC.cloud Perks
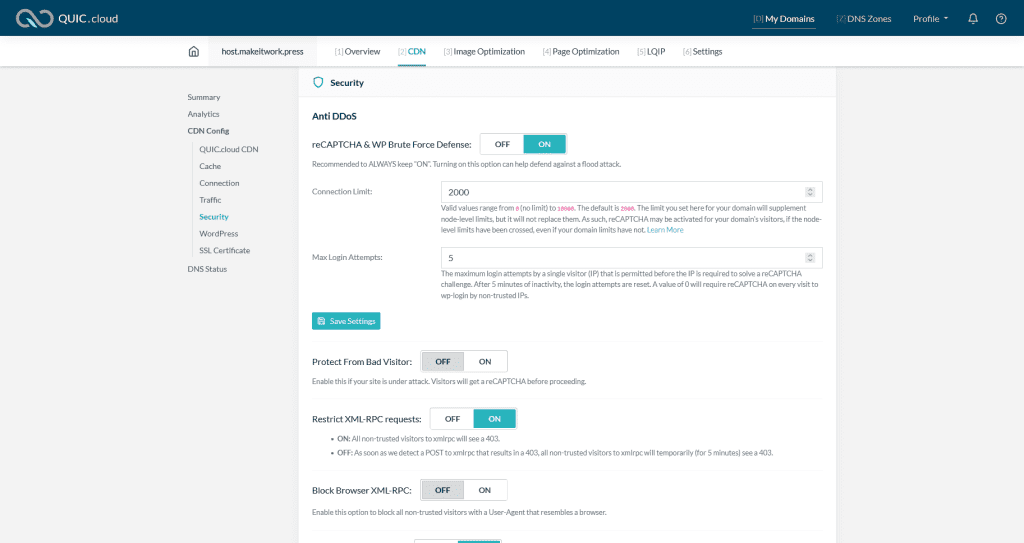
Optionally, you can enjoy one of the other perks that QUIC.cloud offers.
- Enable image optimization from the plugin settings and watch statistics in your control panel.
- Enable additional WordPress security settings from the CDN config, such as DDoS protection, XML-RPC protection and brute force login protection.
- Enable LQIP and CSS optimizations from the control dashboard ánd the WordPress plugin settings.
Step 7: Sit back and enjoy
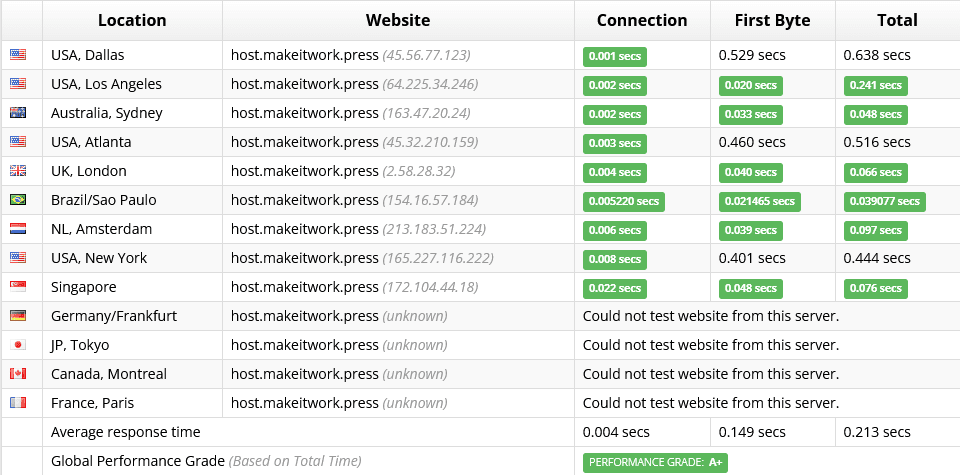
Finally, sit back end enjoy a faster and more secure website. This is what I arrived at (it’s doing well, really well)
So what do you think of QUIC.cloud? Feel free to leave a comment below!